
Hey to all you beautiful creators out there!💓
It is week 2 of year 2021 and I am on my second project of the year, if you haven’t already checkout my previous post about the wonderful and relaxing art form of mandala dot painting! I really enjoyed that one and hope you do as well.
In case you don’t already know I am artist April Small and I am a long time acrylic paint class instructor and certified Master life Coach/Therapeutic Art Life Coach who you can connect with directly on Facebook . I love to bring people and communities together to get creative and particularly LOVE helping individuals like you to find your creative path. Each and every one of us has their own unique creative voice and I feel as though it is my special place her on earth to help others tap into that innate creative being that is often lying dormant deep within you. We as humans have a strong desire to take our ideas and see them into existence, we find so much pleasure and joy in the creative process and build confidence and self-esteem when we see the results of our efforts. Check my business page Odonata Artistic Services for my upcoming in person or virtual classes and workshops or join my group Creating HeART to further develop your creative habit.
Lets start off with what in the world is paint pouring?🤔
To keep it super simple we combine paint and water or a pouring medium of our choice together and then find unique ways to put different color combinations of this paint on to a canvas! There are also a few different ways to spread the paint and tools that can aide in its design so there is a bit more to it but easy enough right? Totally!
I found this project to be a super easy FUN way for people to get creative. I would HIGLY recommend this particular project to my friends out there, especially the ones that find the traditional “paint night” and forms of painting stressful. I say this because even you who “cant even draw a stick figure” can mix and pour paint! SO definitely give this a try!!!
🤓After doing lots of research I discovered there is like 20 different ways/styles of paint pouring so I will be testing out a few of them over the next few weeks. So I do not overwhelm you, I have chosen to keep it simple by only talking about a standard pour and one alternative, dirty pour, for this weeks post.
TRUST me the worst thing I could do is overwhelm you with all the many options of applying and manipulating the paint and different things that could be added to your paint to get you different results. That’s when people get stressed and projects NEVER GET STARTED. So let’s follow the KISS method and KEEP IT SIMPLE. 👌
So to clarify this weeks post we will be exploring the differences between using water vs pouring medium and a classic PLUS an alternative “dirty pour”ONLY I have so much more to share with you, and I will, but we are going to stick with KISS and space out the content.
🚨HELPFUL TIP ALERT🚨
If your anything like me you’ve watched some paint pouring videos and seen some of the many ways you can paint enjoy pouring and all the docent chemicals to play around with or gadgets that you can use. Remember KISS , and don’t you forget it! Don’t go out and buy all the things just yet.🛍
TRUST me, start simple with this easy project and these simple tools. SEE IF YOU ACTUALLY LIKE AND WANT TO PURSUE THIS FURTHER BEFORE GOING OUT AND SPENDING YOUR MONEY ON ALL THE THINGS.
👉I know I personally have a ton of things stored away that I have full intentions of using that have been just sitting there collecting dust. So if you find yourself with a shopping cart filled with stuff, take a breath and ask yourself if you really need all this just yet. I like to acquire my things over time and slowly learn to incorporate them, this prevents the overwhelm and frustration that causes us to end up avoiding crafting all together.
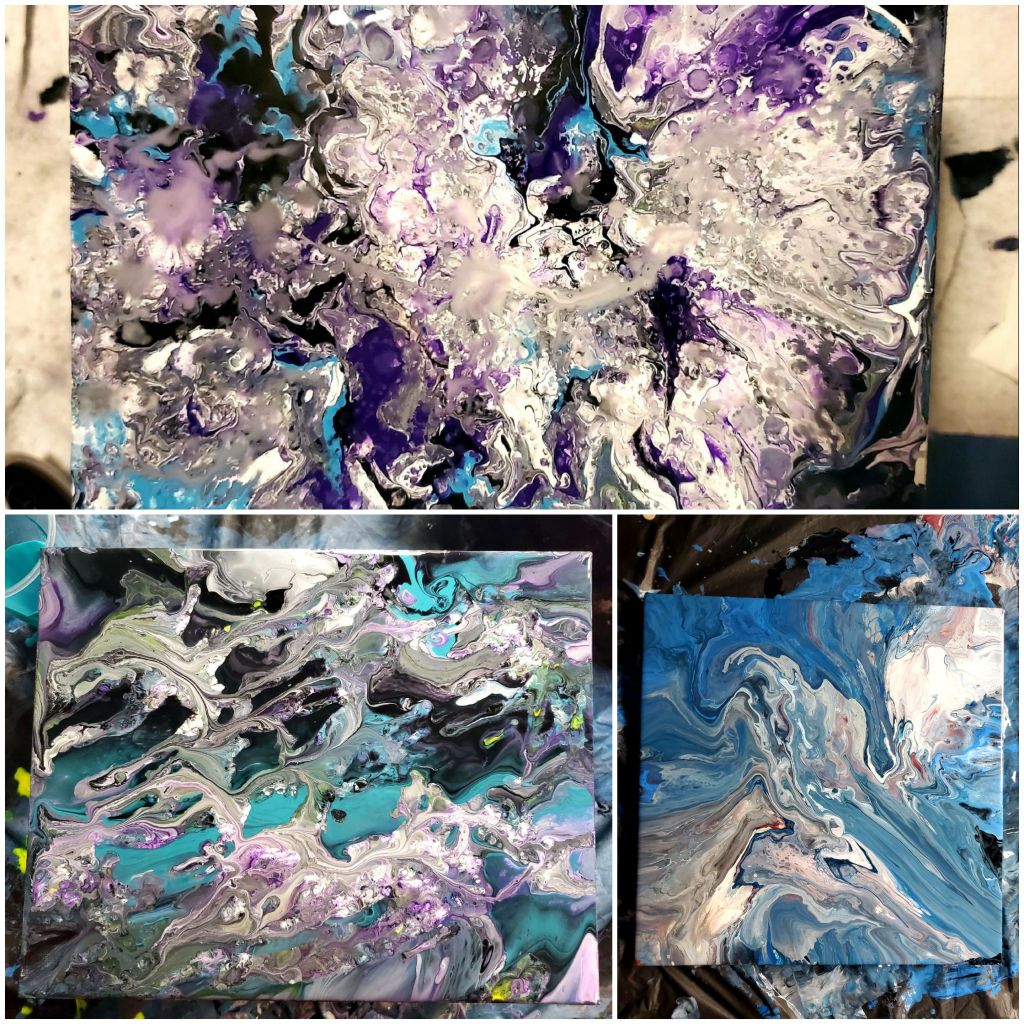
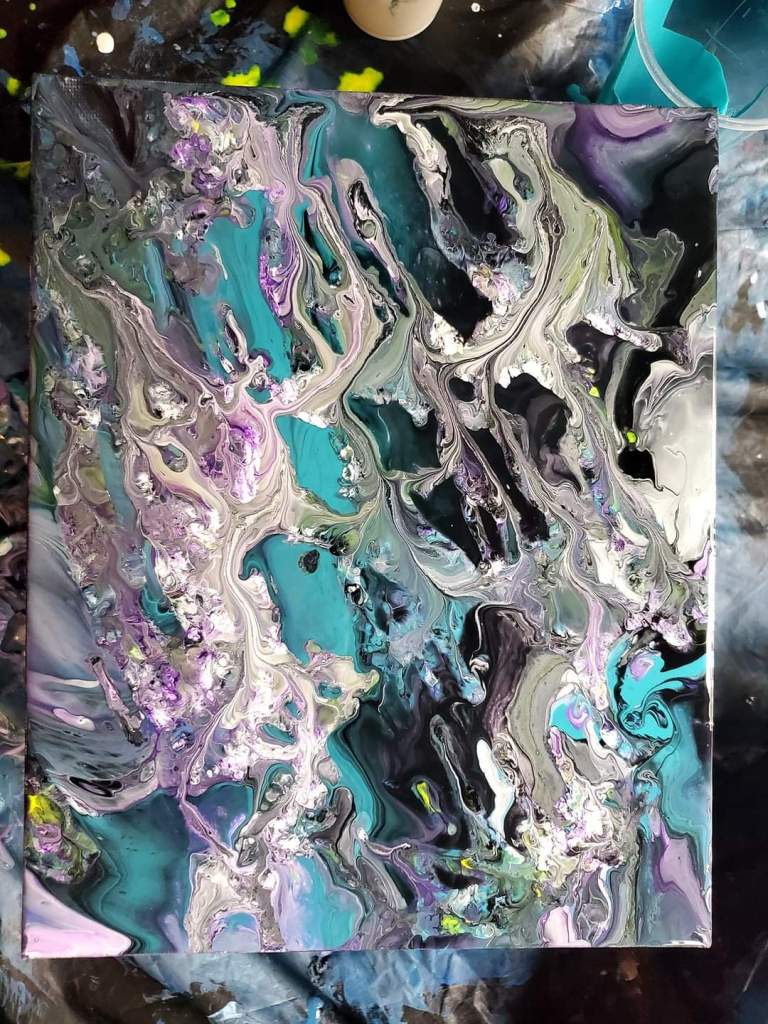
My experience with trying this was awesome, even the painting I accidently knocked over (which I caught on video) ended up coming out beautiful. So take a deep breath relax that body and those arms by shaking off the day and lets begin!👩🎨
🎉SO LETS DO THIS!
First things first, lets talk materials!
🖼Surfaces
I always like to start with what surface I am going to use because often the surface has some insight into what type of paint and materials we will need. This time I want us using a classic canvas or canvas board. Normally id say options are endless but for this particular project and for the sake of simplicity (remember the KISS method) we want to give this a try on the surface that is best for this specific project and that is canvas. Now if you want to get funky you can always try a fun shaped canvas! I seen star, circle, oval… all kinds of shapes out there but it can get pricey! You can find canvases at Michael’s, Walmart or your local craft store in all shapes and sizes!
🎨Acrylic Paint, my old faithful🥰
We have to use acrylic paint for this project, it is water based and works well when mixed with more water and with different pouring mediums. The reason I have always used, taught classes with and LOVED acrylic is because of its versatility and it dries fairly quickly. You can find acrylic at Michael’s, Walmart or your local craft store in all shapes and sizes!
🚨HELPFUL TIP ALERT🚨
*I will say for this project BE AWARE OF ITS DRYING TIME it may take 24 or more hours to dry so make sure you have a space prepared ahead of time for it to sit and dry. I have pets and I almost had an incident that could have caused my painting to be ruined SO TAKE CAUTION, find a spot it wont get messed with for it to rest when you are done.
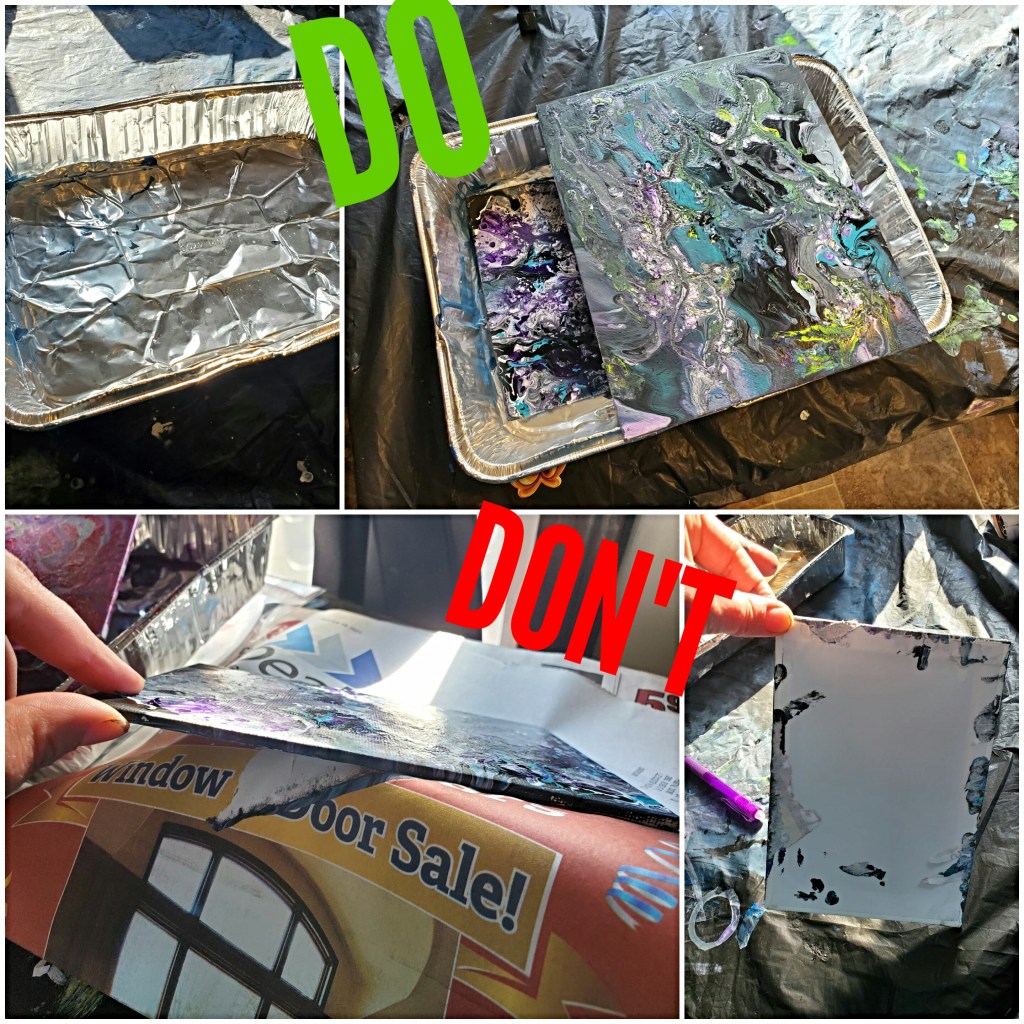
Also make sure your putting your marvelous creation on something it WON’T STICK TO. I knew better and still did it. 🙈 So learn from my mistake and place something smaller than your canvas yet sturdy under your painting like a small box or rest it on a foil baking tin that you can pull it right off of.
💧Water vs Paint Medium
The results of my attempts lead me to a conclusion that BOTH options work well and about the same way. The only real difference is how you want it to look when it dries. If you use a glossy paint pouring medium your going to get a nice shiny finish, the medium also protects the paint from cracking and slows the wear/fading of your creation. When it comes to the actual pouring aspect the flow of the paint was so similar that I wouldn’t see either or as better. WORK WITH WHAT YOU HAVE AVAILABLE. You can always add a glossy finish later on, its not that serious.
If your on a tight budget Walmart has a pouring medium that is super cheap (I did read the ratings and decided to test it out anyway, there was apparently a bad batch but the one I received worked great and had no issues). You can find better quality ones of course, Michael’s has some great options or try whatever local craft store you prefer.
🛠Tools: Mixer, Cups and Measuring
🪄You will need some form of a stick to mix the paint with water or the medium of your choice. You can use whatever you have at home and just clean it off or popsicle sticks work great too.
🥛Cups can be plastic cups, glass, or silicone and if you like to be exact you may want them to have measurements mapped out for you. Honestly I just eyeballed it and had no issues. PLUS, I find that it really isn’t an exact science.
Here’s the scoop.
*Thicker paint needs more water or pouring medium.
*Thinner paint needs less.
🤯Mind blowing right!? No all jokes aside, just be aware of it and use your best judgment and check out the helpful tip below.
🚨HELPFUL TIP ALERT🚨
Playing around with it in your mixing cup until you get to a consistency you like, most. I did research and there are many different answers. 1 part paint to 3 parts medium but that would only be for really thick paint, 1 part paint to 1.5 medium or even 1 and 1 both of which is only accurate for specific brands of paint that those particular people where using.
After trying for myself I know this is what is best especially since we are all probably using different brands with different constancies, start out with your paint and add SMALL amounts of pouring medium until you get somewhere between the paints original consistency and ink. YOU DON’T WANT IT TO THIN if it gets like a watery ink you have gone to far. But!!! Don’t stress just add some more paint to get it back to where you want it. THINK OF IT LIKE A FUN SCINECE EXPERIMENT!
👉All mediums are not equal. I’m not talking about quality, although that may play a role in this, but level of viscosity (thick or thinness), to say it simply each brand and type will vary in viscosity.
👉Each paint is also different! This includes both brands and the color differences!!! The ingredients used to formulate your colors differ, there for the consistency and level of pigmentation (strength that the color shows through) will vary. So take your time and know that each paint might be a little different.
To watery!

Here’s is an example of what happens when you have to much water. It gets cloudy and muddy or murky looking. Now there is nothing wrong with that! If you like the way it looks then GREAT!
Personally I find the most beauty lies in the imperfections. So if you make a mistake or you see something that’s not exactly like the rest give it a moment. Look at it with soft eyes from every angle, take it all in, if you find you get comfortable with it then keep it! You might even grow to LOVE the imperfection because it’s so unique.
🏠Work space and covering the area! VERY IMPORTANT
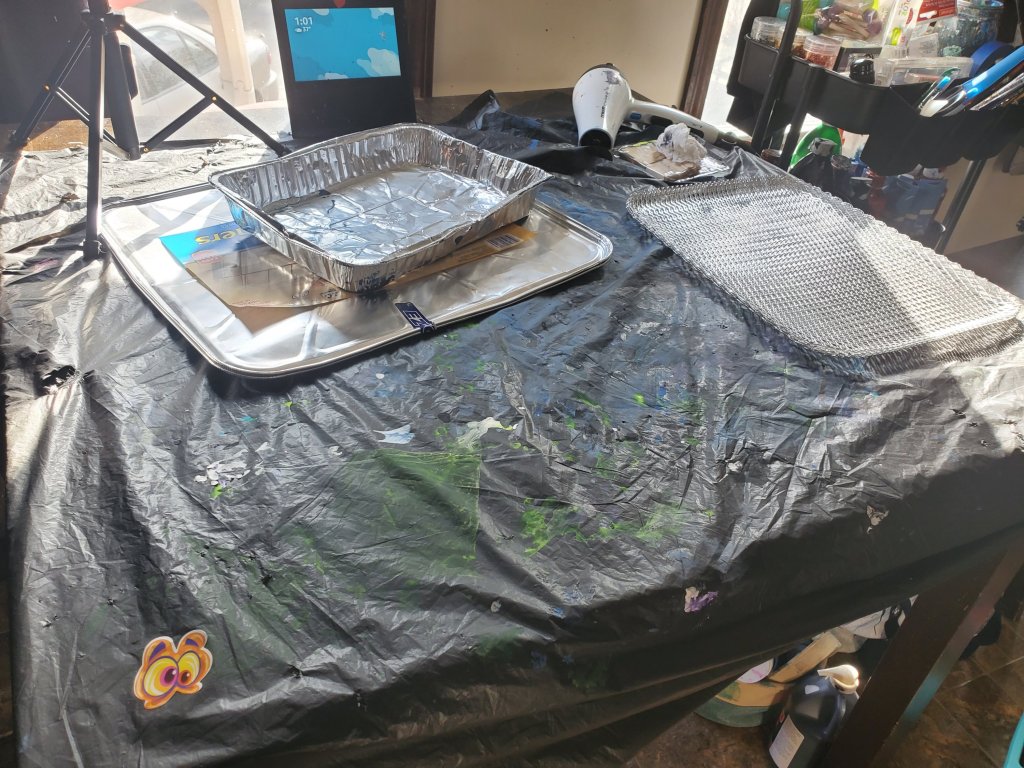
☔Cover your work area, things are about to get messy! Depending on the size of your canvas there are some options. When doing a smaller size I highly recommend using those inexpensive foil tins you get from the baking section of your local store. Larger canvases I recommend a painters canvas or plastic tarp BUT you can also just use a disposable table cover from the party section at Walmart no big deal as long as you have something!
Different ways to pour = different results!
👉So this week we will discus pouring it on to the canvas directly with just our cup in hand!
The Step-by-step
1️⃣First take out the number of paints you want to use and equal amount of cups to put them in. I highly recommend starting out with fewer colors like only 3 or 4.
2️⃣Next depending on the size of your canvas you will need more or less paint start somewhere and moving forward your learn how to gage if that was not enough or to much. You can always add more paint so I go by the rule less is best so that I’m not wasteful.
Now start adding small amounts of water or your pouring medium of choice. Mix until you get to a consistency you like. I went over this above so if you need to go back and reread I recommend doing so but basically you want it to be fluid but not to watery.
3️⃣Now you can literally just drizzle the paint directly on your canvas. Check out my video of me doing this project with Lillian, you can see this is a super fun easy way to get crafty with the kids at home. So unless your in need of a little me time I encourage you to get the whole family involved!
Or 3️⃣ You could also start with a base coat. So let’s say white (you can do any color you want), take your white and poor it on your canvas, then pick up the canvas and move the paint around by tilting it side to side slowly until the entire canvas is covered. Once you’ve done this you can now take your other colors and start slowly drizzling them on top.
4️⃣Once your paint is on the canvas, the canvas does NOT need to be entirely covered, you just have to have enough on there that you know the canvas will get covered when you pick it up and start tilting it slowly moving the paint around until you like the way it looks and all of the dry canvas has been covered and no longer shows through.
5️⃣ Put it aside to dry, remember my helpful tips about having a safe place to put it already set up. It could take 24-48 hours to dry. So just check on it from time to time. ⏰
ALTENATIVE METHOD – DIRTY POUR
The only difference between the first method I just instructed is that in a dirty pour we take all the paint we have separately mixed with our water or painting medium and then we layer them in another cup. One one top of the other. You can watch my first attempt and read the instructions bellow!
First mix your paint just like step 1️⃣ and 2️⃣
➡️Next take a new cup and poor in, as many layers as you wish, with each of the paints you have premixed.
➡️Once you have what you think will be enough paint to cover the canvas you are going to take that canvas, place it on top of the cup FACE SIDE DOWN.
➡️ Then you will flip it over holding the cup in the CENTER of the canvas, DONT REMOVE THE CUP JUST YET, leave it CUP OPENING DOWN on the canvas and wait a minute or two for the paint to come down to the cups opening before you pull the cup up off the canvas.
(so basically the paint should be still inside the cup forming a pool on top of the side of the canvas that you want the paint to be on, NOT ON THE BACK OF THE CANVAS) 🤣😅
➡️When you pull the cup off it should start to spread out, you will still need to pick up the canvas and tilt it from side to side until the paint covers the entire surface and you get it to look the way you like it.
AFTER it’s completely dry you can always add a top coat if you decide but don’t touch it until it’s 1,000% completely dry. It’s totally OK to add extra details, treasures and sealants to jazz things up a little, EXPERIMENT! (we will get more in to this in another post)
👉Once you have completed your project I really hope🤞🤞🤞 you share how it went and what you came up with! Please feel free to comment below and/or on Facebook (OdonataByAS) and Instagram (OdonataArtisticServices) I am here if you have an questions or run in to any issues during the process and will get back to you as quickly as I can within my ability to do so.
Now don’t forget to stay tuned because I’m not even close to being done with this subject. We still have many other styles and even fun tools like torches and blow dryers to play around with and explore!
So if you enjoyed the simple paint pouring you will definitely want to follow along as we develop this and our skills further!
💓Sending lots of love to you and best wishes on your magical creative journey,
Artist and friend April Small💕

2 Comments Add yours