
Hello creator!💕
I just want to clarify, I say creator because you, YES YOU! are the creator of so many things. I have the pleasure of working with so many different people and one thing many of them have had in common is the dreaded misconception that they are not good enough, “I’m just not creative” or “I can’t even draw a stick figure”. The truth is you are good enough and YOU ARE CREATIVE, we all are! Each and every day you create something, whether it be a delicious meal or batch of cookies for your family, putting together that snazzy outfit you feel great in, or working on a business plan, dancing to your favorite music, and even creating a post on Facebook. Literally everything you do throughout your day and your life you are creating, taking your ideas and bringing them to existence. So please realize that not only are you creative but your a unique creative being that has the ability to tap into your very own special brand of creative genius!!! Don’t hold back, let it shine! Let yourself SHINE!!!
In case you don’t already know I am artist April Small and I am a long time acrylic paint class instructor and certified Master life Coach/Therapeutic Art Life Coach who you can connect with directly on Facebook . I love to bring people and communities together to get creative and particularly LOVE helping individuals like you to find your creative path. Each and every one of us has their own unique creative voice and I feel as though it is my special place her on earth to help others tap into that innate creative being that is often lying dormant deep within you. We as humans have a strong desire to take our ideas and see them into existence, we find so much pleasure and joy in the creative process and build confidence and self-esteem when we see the results of our efforts. Check my business page Odonata Artistic Services for my upcoming in person or virtual classes and workshops or join my group Creating HeART to further develop your creative habit.
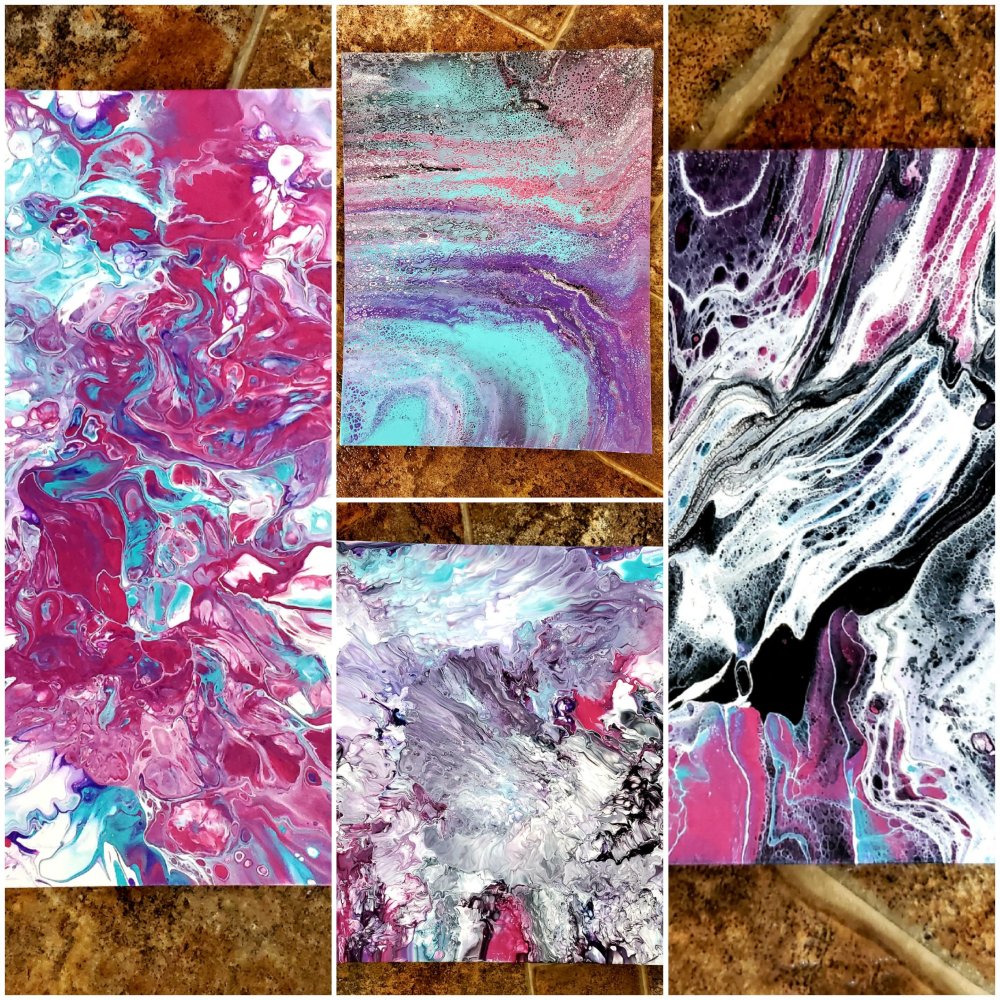
It was week 3 and I spent it still exploring the wonderful art of fluid paint pouring, if you haven’t already checkout my previous post about paint pouring basics! You will need to know the basics I went over in that post because this week I simply expanded on the subject. There is so much to learn in regards to technique and experimenting with different combinations of colors and fluids that I will most likely be revisiting this a few times.
🚨HELPFUL TIP ALERT🚨
Canvas Boards Bend🤷♀️
So although canvas board can be cheaper they don’t really work well for this project unless you intend to frame it. By adding a frame on to it you may be able to prevent the bending that happens because of the heavy saturation from the paint.💁♀️
💧Cell Activator – Silicone
The part I can safely say Lillian enjoyed the most about our paint pouring adventure was definitely spraying the silicone spray. Soon as it hits the canvas you can see these amazing colors peak out from underneath our top layer of paint. Its like paint pouring fireworks happening on your canvas, it is so magical! To magical not to try at home so go down to your local store and get some silicone spray, make sure its just silicone though it cant be mixed with other chemicals. Silicone is basically just a colorless oil and works well with acrylic and other water based products making it a great option as a cell activator. You can use the silicone spray to give a little blast of silicone to your canvas creating tons of small cells or you can add a few drops of silicone lubricant to your paint when mixing it with your paint medium. You can also drip a few drops on the paint after you have it set on your canvas, this will also create more cells and they will be a bit larger than the ones you create with the silicone spray. (There is also another way to create larger cells which involves spinning your painting, we will be visiting this technique at a later date🎉)
👩🏭Applying Heat
Using a torch lighter carefully apply heat over, but not directly contacting the painted canvas helps you get out any trapped air bubbles that might affect your painting and it can also add additional cells to your creation.
🧑🔬Experiment With The Pouring
You do not want to fall into the trap that we set for ourselves far to often, the “this is how its done and there is no other correct way to do it” trap. Especially in art there is no one way of doing things, there is endless possibilities in art and exploring those possibilities is so exciting and fulfilling. I know I have found so much value in my creative practice because it allows me to explore not just in my creation but explore and learn things about myself as well. So ENJOY THE PROCESS, TRY NEW THINGS! What’s the worst that can happen, you mess up and have to try again? No big deal!

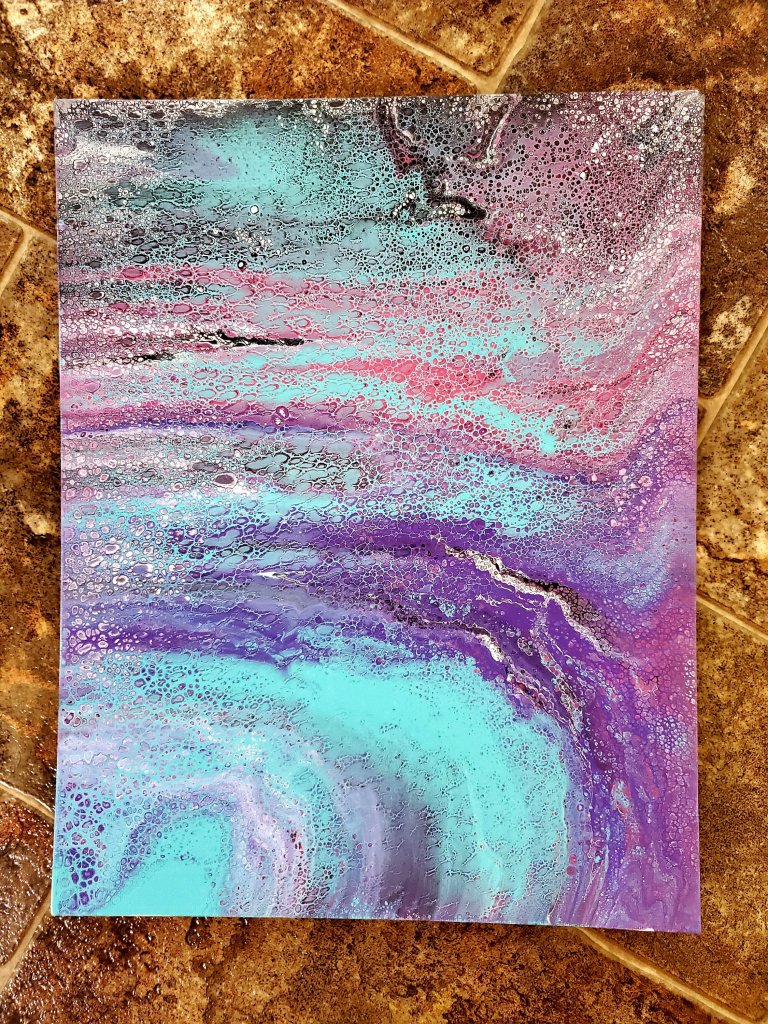
So explore different ways of applying the paint to the canvas, pouring it from other shaped containers is one way. Above is the finished product from me using a rectangle box, you can see the results where beautiful. Look around your home and see what cool options you have around, just make sure its not something your going to get in trouble for wrecking because you may be throwing it out when your done using it. Some things you will be able to wash the paint off, like plastic, glass and silicone but not everything so I just want you to be aware before you get started.
Dutch Pour
You can also change the way you pour, a great example of this would be a Dutch Pour, check out my video. With this project you will need all the same materials as you used in a standard pour PLUS you will need a blow dryer or a straw could also be used for you to manually blow the paint out yourself. This can get messy so make sure you fully cover your workspace.
Here is the step-by-step
1️⃣First take out the number of paints you want to use and equal amount of cups to put them in. I highly recommend starting out with fewer colors like only 3 or 4.
2️⃣Next depending on the size of your canvas you will need more or less paint start somewhere and moving forward your learn how to gage if that was not enough or to much. You can always add more paint so I go by the rule less is best so that I’m not wasteful.
Now start adding small amounts of water or your pouring medium of choice. Mix until you get to a consistency you like. I went over this above so if you need to go back and reread I recommend doing so but basically you want it to be fluid but not to watery.
3️⃣ You must start with a base coat. So let’s say white (you can do any color you want), take your white paint, (no pouring medium needed) and pour it on your canvas, then pick up the canvas and move the paint around by tilting it side to side slowly until the entire canvas is covered. You can also add an extra pillowy layer of the white pant down the middle of your canvas where you will be layering your colors in the next step.
4️⃣Once you’ve done this you can now take your other colors and start slowly drizzling them on top. You want to pour them down the middle of your canvas layering them one on top of the other like this:
Once your paint is on the canvas its time to get out your blow dryer or straw, you do not need the blow dryer on full blast I just had it on low and I did not have the heat on. So on its lowest setting your going to blow air on the paint you layered down the middle first go one direction then come back going the other check out my video. This splatters the paint outward on your canvas it gets the colors mingling together.
Now you can stop here and see what happens or you can pick it up and start tilting it slowly moving the paint around until you like the way it looks and all of the canvas has been covered like you see me doing in my video.
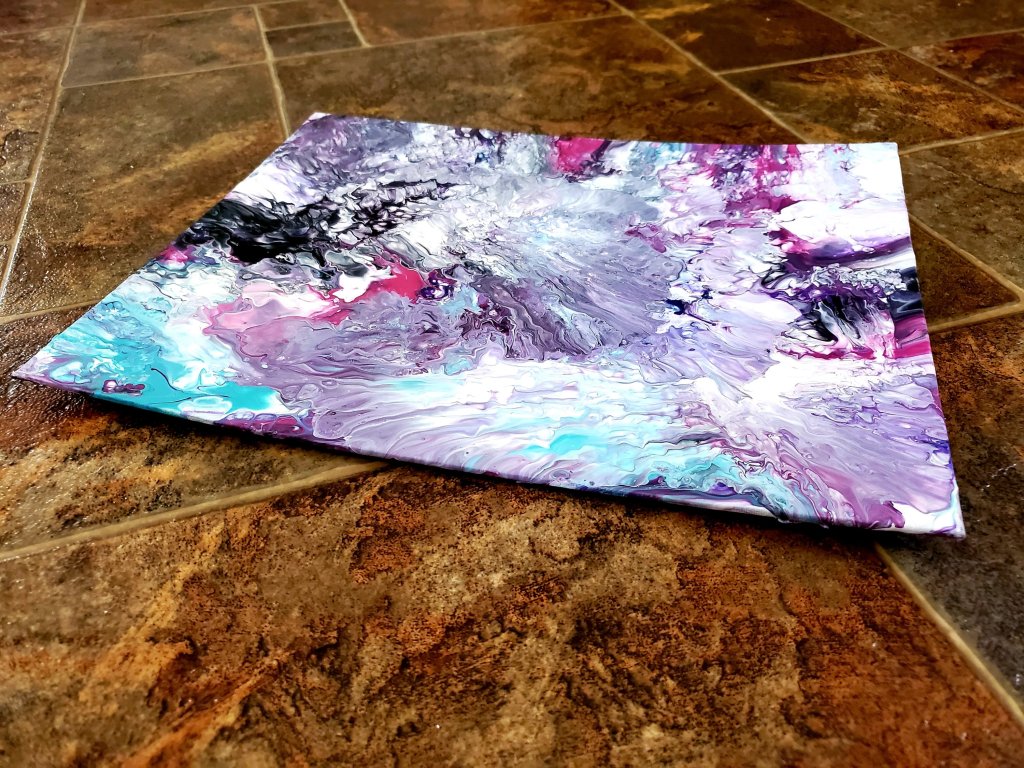
👉Either way is correct, step back and take a look at your painting every few minutes and ask yourself if you like it the way it is or do you want to keep playing around with it. REMEMBER THE MORE YOU MESS WITH IT THE MORE IT CAN BECOME A BIT OF A HOT MESS. Check out the picture bellow of one of my not so great attempts. You can see it got a bit muddy there in the middle.

5️⃣ Put it aside to dry, remember my helpful tips about having a safe place to put it already set up from my previous blog post. It could take 24-72 hours to dry. So just check on it from time to time. ⏰
👉Once you have completed your project I really hope🤞🤞🤞 you share how it went and what you came up with! Please feel free to comment below and/or on Facebook (OdonataByAS) and Instagram (OdonataArtisticServices) I am here if you have an questions or run in to any issues during the process and will get back to you as quickly as I can within my ability to do so.
Now don’t forget to stay tuned because I’m not even close to being done with this subject. We still have many other styles and even fun tools like torches and blow dryers to play around with and explore!
So if you enjoyed the simple paint pouring you will definitely want to follow along as we develop this and our skills further!
💓Sending lots of love to you and best wishes on your magical creative journey,
Artist and friend April Small💕

One Comment Add yours